Using Flashprint
Introduction
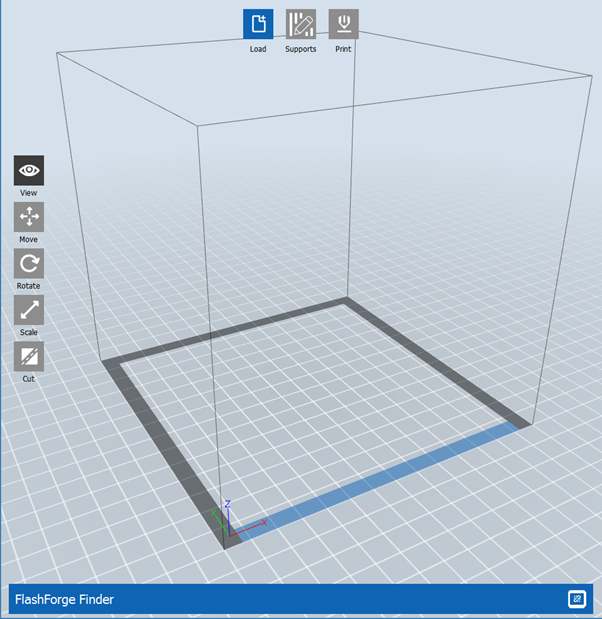
Flashprint is the program used to convert the .stl file exported from Openscad or Blender into a .gx file which can be recognised by the printer. Upon opening, you can select the printer model from the ‘Print’ tab and the size of the region you can print in appears. Now a file can be loaded using the ‘Load’ button or by dragging and dropping in the .stl file.
Error Messages
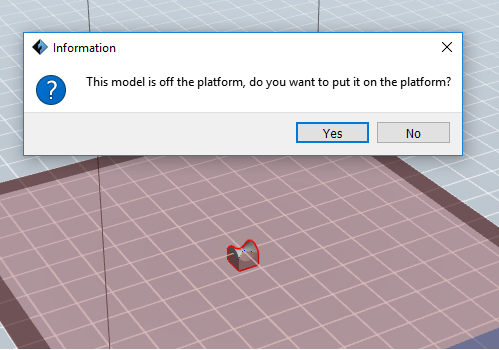
Sometimes a pop-up window will appear saying that “The model is off the platform, do you want to put it on the platform?”. In this case it is usually more useful to select ‘yes’. Although, it is possible to do this manually by formatting the model.
Another error that may appear says “Error has occurred to the model. You can” and then displays several options. ‘Repair model’ attempts to fix the file into a printable model, ‘Delete model’ removes the model and ‘Ignore’ results in the model being left unchanged. Should this error appear it is often best to go back to the original software used to create the .stl file and fix what the issue is there.
Adjusting the Model
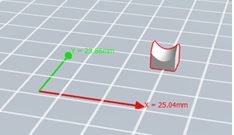
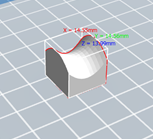
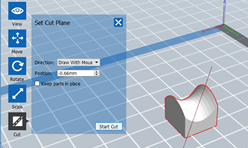
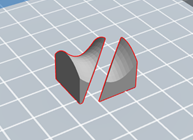
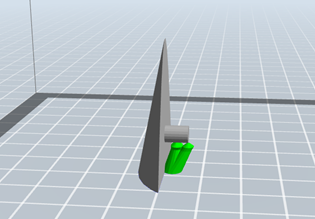
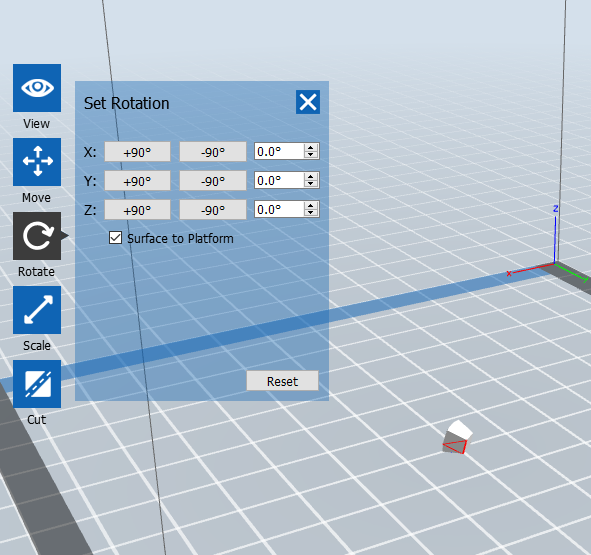
The tabs on the left-hand side of the window can be used to edit various features of the models. The ‘View’ button allows the object to be seen with the scroller on the mouse allowing zooming. The ‘Move’ (Figure 1)button allows the position of the model on the plat to be changed. This helps with fitting multiple different models in the same printing cycle. ‘Rotate’ (Figure 5) provides 3 circles along the x, y and z axes to rotate the model around (also see section 7 for how to rotate model onto a particular side). The ‘Scale’ (Figure 2) button allows the dimensions of the model to be increased, be that uniformly or not. Finally, ‘Cut’ (Figures 3 and 4) allows the model to be sliced depending on where the cut is made by the user.

Supports
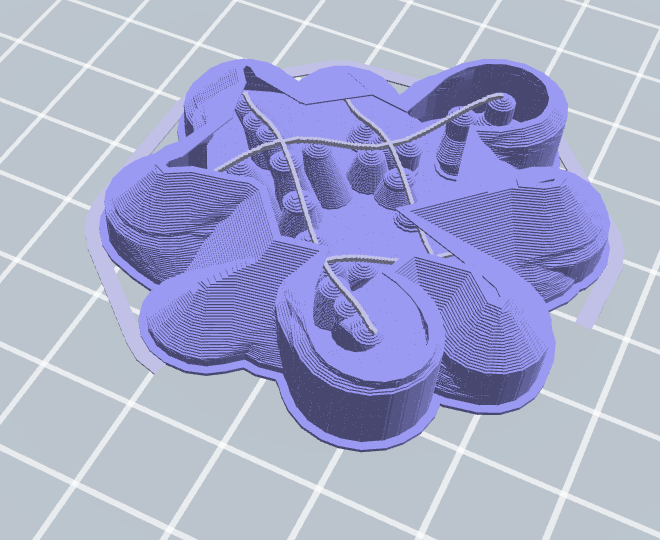
The use of supports for more fragile or overhanging parts of the model can also be enabled using the ‘Supports’ button. The ‘Auto Supports’ feature (found by clicking on ‘Supports’ first) creates supports in all the places the model would need them to print successfully. These supports are easy enough to snap off the model post-print. In the ‘Support Options’ menu, there is the choice for tree-like or linear supports.
TIP: The tree-like supports are more efficient and easier to snap off
Brims, Rafts and Walls
A brim can be added to the model if it doesn’t make much contact with the plate. It ensures that the model wont come off the plate part way through the printing process. This works by adding a surrounding layer or two for each part of the model not touching the plate to allow ease of sticking to the plate. It also adds an offset round the edge of the model. Adding a brim is especially useful when printing with the FlashForge Finder as it doesn’t have a heated plate (like the Dreamer).
Rafts work in a similar way, but sit underneath the whole model (with an offset drawn around the base of the model) rather than just the parts not sticking to the plate. This can be very useful for creating a stand if the model doesn’t have a large base or to prevent warping for a model where a lot of it touches the plate. This is a little thicker than a brim, making it a sturdier base but using more filament.
Walls are especially useful on the Dreamer, where two extruders may be running at the same time. They surround the full model and act as a shield from any filament that may be loose from either extruder. It also ensures some parts of the model are supported as it is built on a structure similar to a brim. It is worth noting that this uses much more filament than a normal model would, so make sure the printer is well stocked. Sometimes you may need to add a raft or brim when adding walls to make sure they stick on the plate too.
Useful Shortcuts
In a similar way to other programs, cut, copy and paste shortcuts can be used for ease of duplicating objects. The undo shortcut is also available to reverse any previous commands.
TIP: Holding the right mouse button down and dragging rotates the view.
Useful Tricks
As with any program, there are a few tips and tricks we can perform to create models in a simpler way. For example, if we select a model and open the rotation tab, we can select ’Surface to platform’ and when we double click on a surface, this becomes the face of the model that will sit on the plate. This is useful if it would otherwise be difficult to rotate a shape to sit on a large or flat face on the design software.
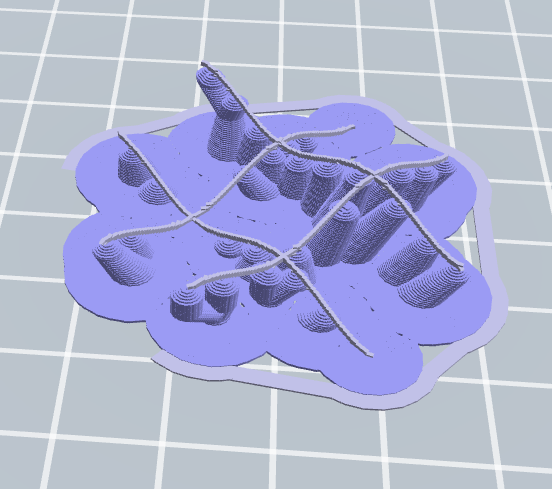
3D printing a 2D image
Flashprint also supports imported 2D images ( in .png, .jpg, .jpeg and .bmp file formats) which can be extruded to a 3D object. It does this by making a height map of the image, with the choice of either darker or lighter areas being extruding more. Changing this can give the illusion of engraving. It also provides the option to change the and lengths to increase or decrease the size of the image without affecting the height (more ideal that scaling afterwards). You can also wrap the image around objects such as spheres, hollowed out cylinders and even a ’lampshade’.
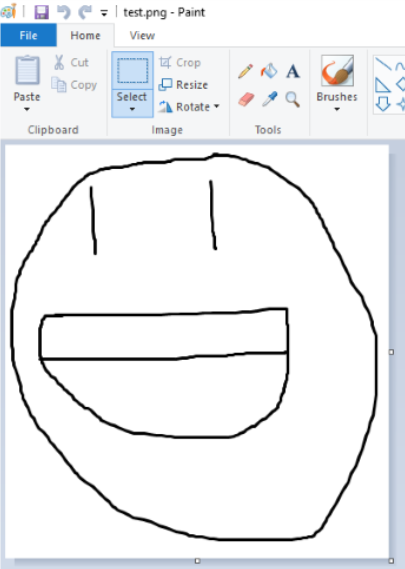
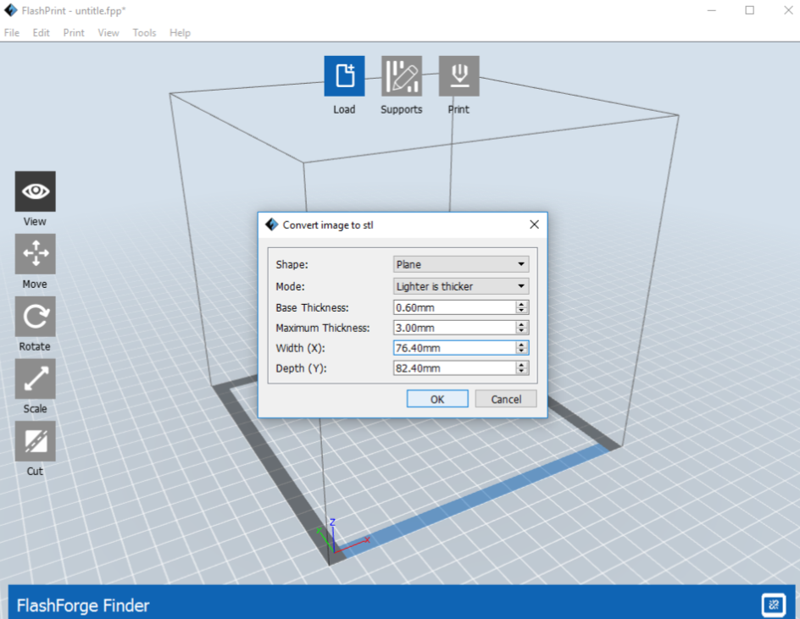
This image was drawn out on paint and saved as a .png file. The initial width was then changed from 76.40 mm to 50.00mm, the depth then scaled uniformly with the width without affecting the height of extrusion. 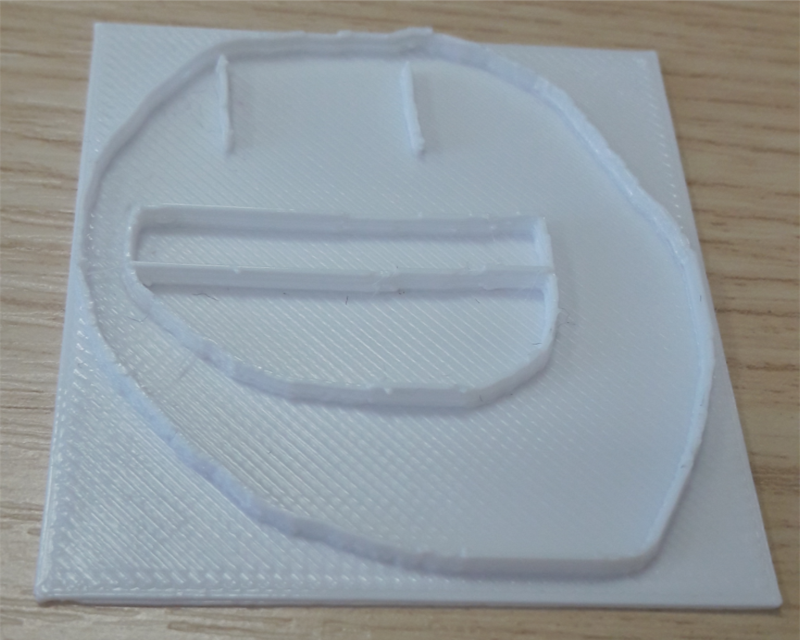 Then print it off to get this as a result.
Applications of this could include printing off heat maps for not only easier visualisation of the data but so people who are visually impaired can feel the model. We can vary the maximum height of the model too, so subtle differences can be clearly seen if the range of heights is 100mm rather than 10mm.
TIP: Flashprint allows you to select either lighter or darker regions as the thickest part of the model. This means a light model on a dark background could be made to be a like a mould or like a stamp depending on how the picture file is formatted.
Preparing for Printing
Once the model is created and ready to be printed, the ‘Print’ button should be pressed. At this point, a menu appears which allows the user to enter the machine type and material used. The resolution of the final printed model can also be adjusted - from low resolution taking less time up to hyper resolution taking the longest time but being the most accurate.
Once these options have been selected, the model will be ready to be saved as a .gx file, and this can be saved to the PC or onto a flash drive. Then, this file can be sent across to the printer via wired cable, USB to be created on the Finder or SD card to be created on the Dreamer.
Troubleshooting
Issue |
Cause of Issue |
Solution |
Model not sitting on the plate |
Intricate shapes may mean some surfaces don’t perfectly sit on the plate if adjusted manually |
Using the ’surface to platform’ button or automatic supports and a raft or brim should guarantee a good base for the model to print on. |
Messy overhanging edges |
A large overhang angle may mean the printer doesn’t have a good base to build upon |
Creating manual or automatic supports should give something better for the printer to build on. Check using ’surface to platform’ if one orientation requires less supporting than others. |