Making models with R
Introduction
R is a programming language which is commonly used for data analysis and visualisation.
RStudio is a graphical interface to R. It’s available on all university computers (and can be accessed remotely through RAS).
There are two R packages which enable the creation of 3D models: rgl and r2stl.
rgl provides functions to construct a ’scene’ out of primitive shapes, or vectors describing a shape’s vertices and faces.
r2stl plots an elevation map of a surface defined by a two-dimensional grid of heights.
rgl
The R package rgl is used to create and visualise 3D models.
After the model has been constructed, it can be exported into an STL file (or file of another format if needed) to send to the printer software.
Install rgl by typing the following into the command window then pressing Ctrl and Enter:
install.packages("rgl")
There are six primitive 3d shapes available in rgl.
These can be opened into a scene (another window where the model is displayed) as a mesh of either vertices, edges or faces using the shape3d class.
The following code plots the vertices of a tetrahedron:
# Load rgl package (if already installed)
library(rgl)

# Open the scene
open3d()

# Plot the vertices of a tetrahedron
dot3d(tetrahedron3d())
If you wished to plot the edges as a wire mesh:
# Open Scene
open3d()

# Plot edges
wire3d(tetrahedron3d())
Most importantly, if you wished to plot the tetrahedron as a solid object (in red for greater visibility):
# Open scene
open3d()

# Plot faces
shade3d(tetrahedron3d(col = "red"))
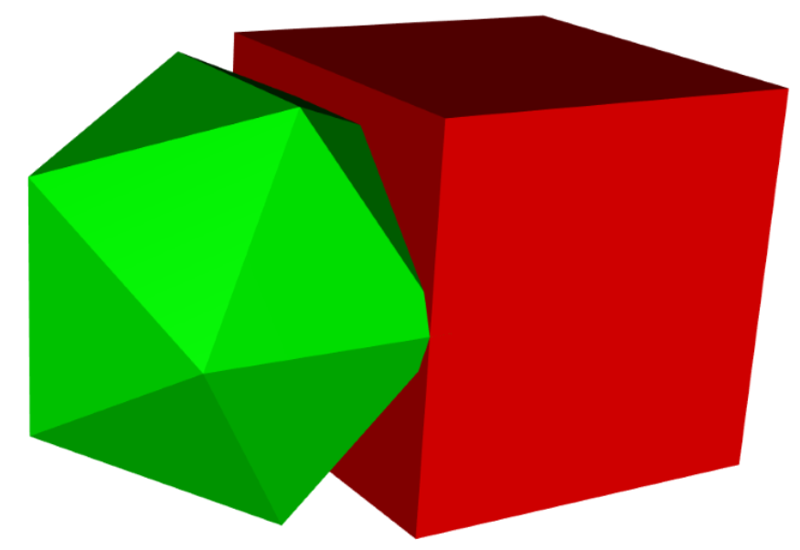
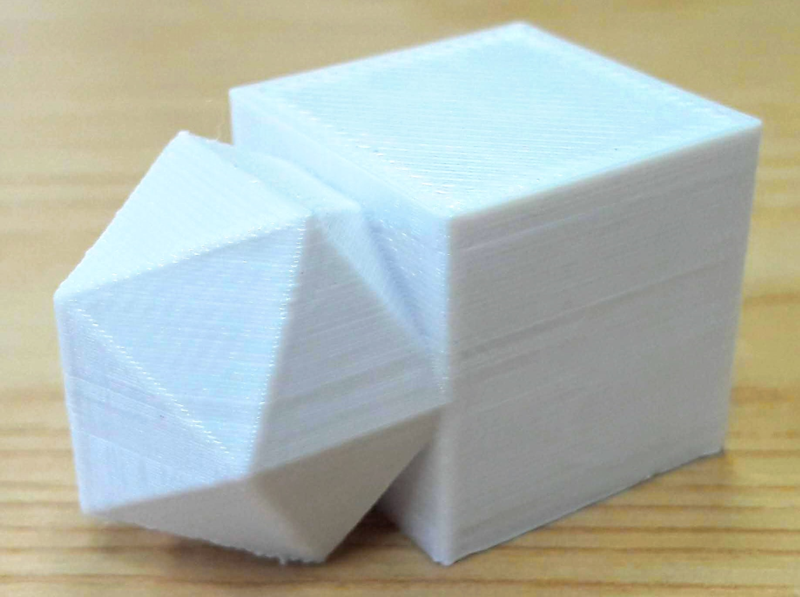
More complex shapes can be can be created from these simple ones. The function shapelist3d() can be used to combine the simple shapes into one single object. It is possible to combine different shapes, e.g. a icosahedron and a cube, by listing them together with the list function.
# Open the scene
open3d()

# Create the shapes into one mesh
shapelist3d(
  # List of shapes
  list(icosahedron3d(col=c("green")),
       cube3d(col=c("red"))),
  # Translation of shapes
  x = c(0,15), y = c(0,0), z = c(0,0),
  size=10
)
Alternatively, you can create several of the same object
# Open the scene
open3d()
# Change the background colour
bg3d("gray50")
# Create the shape
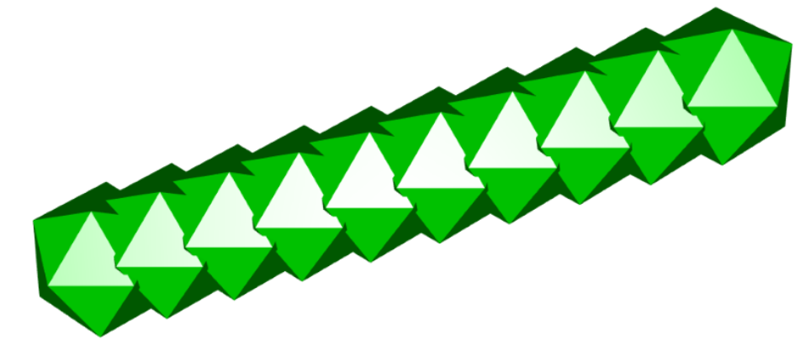
shapelist3d(icosahedron3d(col=c("green")),
x = c(0,0,0,0),
y = c(0,0,0,0),
z = c(0,5,10,15),
size=10)

This shape was constructed by translating a series of icosahedrons by in the z direction (each 5 units along to the previous one). The location of the first shape is given by 1st element of the , and vectors: . The second lies at , the third at , etc. You may notice that the x,y,z vectors are all the same length which is also equal to the number of shapes.
In this instance, a for loop could be rather beneficial for changing variables - if we wished to change the number of shapes or parameterise the translation.
# Number of iterations
n = 10

# Set up vectors for translations
a = vector(mode = "numeric", length = n)
b = vector(mode = "numeric", length = n)
d = vector(mode = "numeric", length = n)

# For loop which parameterises the translation vectors
for (i in 0:n){
  a[i]=i*10 # Move 10 units in x
  b[i]=0    # Fill vector with zeros
  d[i]=i*3  # Move 3 units in z
}

# Open the scene
open3d

# Shape
shapelist3d(
  icosahedron3d(col=c("green")),
  x=a, y = b, z = d,
  size=10
)
Models can also be created from coding a mesh of triangles using Cartesian coordinates for each of the vertices. For loops can be used to generate the vertices of the triangles, which can then be converted into a triangle mesh through the tmesh3d() function. Alternatively, you could code the vertices of several 4 sided shapes (instead of triangles) and create a quad mesh using the qmesh3d() function. In most cases, however, it is better to use triangles as they create smoother surfaces.
To make a model smoother, we can divide each face in the mesh into 4 smaller faces (triangles or quadrilaterals depending on whether tmesh3d or qmesh3d was used in the mesh) subdivision3d() function.
As with OpenSCAD, R supports the extrusion of 2D polygons into 3D either linearly or by rotating a curve through the functions extrude3d() and turn3d() respectively.
Similarly to MATLAB, surfaces can be constructed.
It is possible to import STL files into a scene too, through the readSTL() function.
Exporting models
The function writeSTL() saves whatever has been constructed in the scene into triangles as an STL file. Since the STL format only allows one object per file, all rgl objects within the scene are exported as a single object.
For example, if we wish to export the 4 icosahedron model an earlier example into an STL file (for printing) we would open up the model in the scene then run this line of code:
writeSTL("icosahedron_test.stl")
The rgl package supports the exporting of models into other file formats:
writeOBJ()writes OBJ files which can be read by Blender. It is also useful since individual objects are output as separate objects in the file when settingseparateObjects = TRUEwritePLY()creates a PLY file which can be read by Blender, however all individual rgl objects are combined into a single object.writeWebGL()writes the scene into HTML - files that contain WebGL code to reproduce the scene in a browser. ThewebGLcontrolsfunctions write HTML/Javascript code to control a WebGL display.
Useful Links
r2stl
Alternatively, the r2stl package is used to directly export a 2D vector (without the use of the rgl package) into an STL file in a manner similar to the built-in persp() function. However, the model may not be thick enough to print off and is redundant if using the rgl package.
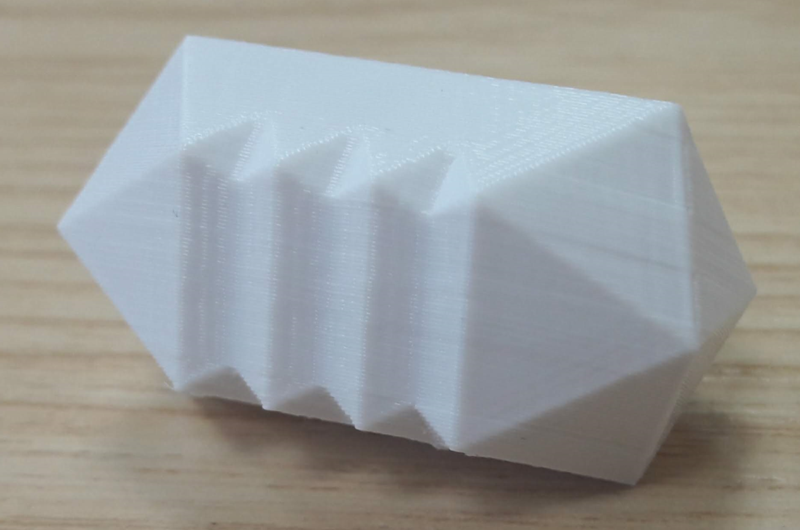
Things we’ve made
Troubleshooting
Issue |
Cause of Issue |
Solution |
Can’t find model after exporting |
STL file may have saved where you can’t find it |
Make sure the directory in R has been set to where you wish the model/code to be saved. Click: Session, Set Working Directory, Choose directory, then select the folder you wish to save things in. |